Showing posts with label iOS. Show all posts

CloudMagic, Best Mail client for iOS and Android


iOS and Android has lot of mail apps in which some provide Good UI but lack in performance, some are good w.r.t it's feature but lack UI and some doesn't even suit to be called as Mail Clients. I am sure that you believe in what I just said. 

A friend of mine mentioned about CloudMagic Mail app some time during the end of October 2013 and I said, "Dude, all Mail clients are one and the same. It's better if I just stick with Gmail app"(Since I use only Gmails) After sometime, I thought let me give a try and headed to Play Store and searched for "CloudMagic". In the search results, first app which play store displayed was "CloudMagic - Free Mail App". Went ahead and installed it. After installation, it asked for login/Sign-Up. Since I already had an account which was previously associated with CloudMagic Search app, I just entered my credentials and logged in.

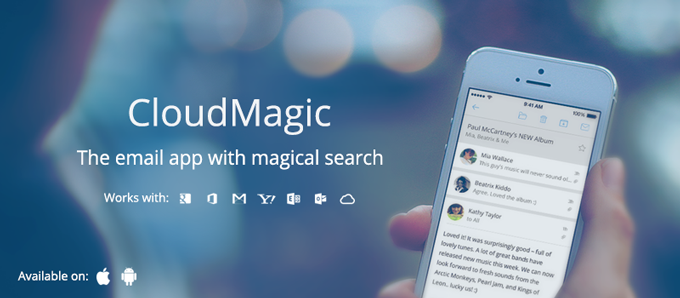
Wow!!! This was the first word which I said just by looking at the UI interface. As I started to look at all the features and facilities provided within the app, I was just saying 3 words. Wow!!!  Awesome!!!  and Beauty!!! Colours are just the way it is meant to be which makes it look clean and neat. No doubt why this app is currently in "Play Picks - Apps we love" section.

First thing which amazed me was the Search speed. I was running on 3G Aircel network when I did my first search. At first, I thought, network speed is brilliant but later realised that the speed with which the results are fetched are brilliantly fast and highly accurate. Best of all is, search across multiple accounts.

Next, Multiple Accounts. Gmail has already provided the feature of multiple accounts, but that is restricted only to Gmail, but this app provides facility to configure accounts of 8 different types. Earlier, they used to support max of 3 accounts and few days back, they increased it to 5.

All Inboxes My most loved feature. You can see all your configured mail accounts in the side drawer along with a special and most useful section "All Inboxes". It combines all mails from all of your accounts, arranges in decreasing order of time and differentiates mails of different accounts with different colours. You cannot customise the colour as of now. 

Default "From" address This comes handy if you have selected "All Inboxes". It provides facility for the end user to set "From" address in "From" field by default when composing a mail.

Passcode Lock No need of any third party apps to secure your mails from unauthorised user. You can set a passcode lock which will be prompted to user whenever app is opened.

CloudMagic has integrated all of the above and all the features which every mail app must have. Looking forward to have some more facilities/features like the following which makes user experience much more awesome.
  1. Swipe left and right to move/shift between mails.
  2. Color Customisation support to differentiate mails from multiple accounts.
  3. Report as spam.
  4. Zooming option within preview.

Download:

Have your ever tried CloudMagic Mail app? If not, then give a try. I am sure you will like it. Leave your comments below.

OS X 10.10 codenamed Syrah to feature iOS7's flatter look

Apple changed system wide look in iOS7 to support beautiful flat User Interface when compared to the gradient look as of iOS6 or lesser. Now, OS X 10.10 codenamed "Syrah" is rumoured to feature iOS7's flatter look. 

According to the reports from 9to5Mac, we can expect some changes to OSX 10.10 featuring blur and translucency effects in few places but not system wide. Apple engineers are currently working on how to make easy for end users to switch between OSX and iOS.

The codename "Syrah" is not confirmed, but Apple will reveal the name of it's next best OSX 10.10 later this year. 

What is your opinion about the codename Syrah? Leave your comments below.

Step by Step procedure to Upload iOS Binary to App Store


Initial Settings:-
  1. Go to the project and open info.plist. Check whether the bundle identifier(com.yourcompany.appname) is correct.
  2. Go to Project settings->Targets->Summary and change the version number to the desired value.(Do not provide any characters), check the deployment target and double check the bundle identifier.
  3. Check the deployment target in Project Settings->Project->Info
Creating a Distribution Provisioning Profile for Your App
  1. Create a distribution profile in the iOS Provisioning Portal with these characteristics:
  2. The app name in the name of the provisioning profile is optional.
  3. The app ID can identify a specific app or an app domain.
  4. Download the distribution provisioning profile.
  5. Install the distribution provisioning profile in your provisioning profiles library:
  6. Drag the <Profile_Name>.mobileprovision file to the Provisioning Profiles list in the Library section of the devices organizer.
Configuring Your Project for App Store Submission
  1. In your project, duplicate the Release build configuration and name the duplicate “AppStore”. This can be done by going to Project Settings->Project->Info and then click on Release. Just below that, you can see a '+' mark. Click on '+” mark and then select “Duplicate Release Configuration”.
  2. Set the Code Signing Identity of the project to the app's distribution profile.
    • Go to Project Settings->Project->Build Settings
    • Go to Code Signing section.
    • Change identities in all sections(AppStore, Debug, Release) to newly downloaded app's distribution profile.(As explained in above section)
    • Double check to be sure that you have selected proper distribution profile.
  3. In the Project Settings->Targets, delete the Validate Build Product build setting specification for the Release build configuration. 
    • Apple says it as delete, but you cannot delete it actually. Just make it as “NO” for Debug and Release. Make “Yes” for AppStore.
  4. Go to Product menu->Manage Schemes and duplicate the scheme that builds your app and name the duplicate as “<App_Name>-AppStore”.
  5. Select “<App_Name>-AppStore” and press Edit.
  6. Select “Archive” section and change the build configuration to “AppStore”.
Create and Validate the Archive
  1. Select the AppStore scheme to build the project. (Next to Run and Stop button).
  2. Select the iOS Device option from the scheme toolbar menu.
  3. Choose Product > Archive.
To validate the archive
  1. In the Archives organizer, select the archive.
  2. Click the Validate button.
  3. Enter your iTunes Connect credentials and click Next.
  4. Select the app you want to share and the appropriate signing identity, and click Next.
  5. Review validation issues found, if any, and click Finish.
Submit the Archive
  1. In the Archives organizer, select the archive.
  2. Click the Distribute button.
  3. Select “Submit to the iOS App Store” and click Next.
  4. Enter your iTunes Connect credentials and click Next.
  5. Select the app you want to share and the appropriate signing identity, and click Next.

fidoFOTO 2.0 iOS App Review

Are you a puppy lover? Do you want to do fun things with your puppy's photo? Then, here is a nice app specially made for your puppy called fidoFOTO. fidoFOTO 1.0 was launched in the month of April 2012 by DMN Networks with very limited functionality. Application was priced at $1.99. Later on, in the month of October 2012, they released an update with lots of features and made its as free.


We have seen lot of applications similar to fidoFOTO but this app is outstanding in its own way. It has got legitimately good interface, beautiful cropping tool, Pretty fast Instagram like filters and finally High Resolution graphics which gives a good looking snap of your puppy.


App flow: You start by selecting an image either from the gallery or you can take a snap of your puppy from the camera and use it. Next comes a screen where-in you can either apply Insta-like effects or use a very handy cropping tool. The unique feature about Cropping tool is that you can crop by rotating your image. Next screen is the actual page where-in you add Graphic assets like Frames, Badges or Graphics on your puppy and decorate it. You can go to fidoSTORE and download amazing Graphics Packs like Christmas, Eyes, Halloween, Thanksgiving, Hair and etc… for just $0.99. I love Christmas and Eyes pack… A cool feature of Autofit for image and Stretch for Badge and Graphics is also provided. Autofit tool Autofits the base image to fit the Frame you have added and Stretch provides a functionality where-in you can actually increase or decrease the width or height of an image by pinching the asset in the specific direction. When you apply filters, it actually applies on the assets added as well. Finally you can Save image to gallery or Share it to social networking sites.    

Features:-
  1. $1.99 to Free.
  2. Beautiful and Clean user interface.
  3. Support for iPhone, iPod and iPad.
  4. Works with iOS6 and above.
  5. 110 free Standard Graphics comes with the application(High Resolution images).
  6. In App Purchase - You can download lots of other Graphics Packs like Election, Eyes, In Memory, Christmas, Thanksgiving and etc...
  7. Very neat Cropping functionality - Provides Cropping functionality with rotation. Unique Crop functionality.
  8. Pretty fast Instagram like effects.
  9. Autofit when Frame covers your image.
  10. Sharing, Saving of your puppy's modified image.
  11. Creation of Calendar event.
  12. Create fidoFOTO ID and share the photo in social networking sites(FB and twitter) if your puppy goes missing.
Download this App from App store. (This app is available only on iOS).
Watch Videos of fidoFOTO here.
Leave a comment about fidoFOTO.

How to jailbreak iPod touch?


There are so many tutorials and videos out there that teach how to jailbreak ipod touch and iphones but the techniques have improved way too much and here is the easiest way which is just a  matter of two clicks to get your iPhone or iPod touch jailbroken. If you are not sure what jailbreaking is then go to the wikipedia page to know more about it.

Why would anyone want to jailbreak his device?

There are a number of reasons. Jailbreaking is similar to rooting your android phones. Jailbreaking gives you much more control over your device. For example, iOS does not by default allow you to change the wallpaper or the theme. But jailbroken devices do.

Here are the assumptions that I've made -

You have a iPod touch or an iPhone running firmware 3.1.2.

Steps follow -

1. Download Blackra1n for your firmware from here - http://blackra1n.org/download-blackra1n/

2. Start the blackra1n.exe

3. Your device will be automatically detected. Just click on the only button that blackra1n.exe provides. Wait for a few minutes and your device will reboot.


4. When your device reboots, you will find a new icon called blackra1n in your device. Open it. Connect to the internet. Download 'Cydia' Installer. Once you're done there will be another icon on your device called 'Cydia'. Using this installer, you get to download lot many applications to your iphone!


This is how you jailbreak a iPod touch or iPhone :) Hope that helps.

PS: There are other ways of jailbreaking a device. This method involves using blackra1n. There are other jailbreaking agents like redsnow, snowbreeze etc. But I personally like blackra1n for its simplicity.

Google Swiffy - Flash to HTML5 Converter


Google has launched its new service called Google Swiffy in the labs. Google was constantly involved in development of HTML5. HTML5 was revolutionary and has so many new capabilities that the flash contents are no longer needed as these can be coded using HTML5 tags along with some JavaScript. HTML5 enabled animations and interactivity in browsers and devices that did not support flash. Even the iPhone's iOS doesn't support Flash and hence HTML5 is a sigh of relief for the iPhone users.

If you have a website with lot of Flash objects and if you're worried of the new HTML5 invasion, then you don't have to worry anymore. Answer is Google Swiffy. Google Swiffy is a flash to HTML5 converter. It is still in its early version and hence not yet ready to convert complicated SWFs (flash files) to HTML5 and it may take some time for it to convert flash games and programs. But you can easily convert simple banners and animations that you have in SWF formats. Just upload the SWF file and get the HTML code. By converting SWF to HTML5, you can make your website view-able on any browser that supports SVG, JavaScript and CSS3.

The link to Swiffy is -

http://swiffy.googlelabs.com/

I just wish this comes out of the labs as a fully fledged SWF-to-HTML5 converter.