Indian Railways launch Rail Radar to get train location in Google maps


The Railways has launched an online application which allows the public to track movement of trains. The application, known as Rail Radar, is an interactive map that helps passengers locate about 6,500 trains on real-time basis on both internet and their cell phones.

This application can be accessed through the railway website - trainenquiry.com. A passenger can enter a train name or number and the system will inform whether the train is delayed or running on time.

Free SMS service by Google via Google Chat


Google has launched its free SMS service in India and other countries using which users can send SMS to people who are in their contact list for free. Google has reported saying that it will not charge for SMS but initially users will be provided with 50 free SMSes. Google would decrease this count by one everytime you send a SMS but the good thing is that when a user responds to text message, the count increases by 5.

If SMS count becomes 0(zero), it would ideally reset within 24hours or the user can buy the credit by paying for the service.

This service went live in India and other 51 countries on October 10th. Google has also provided service where-in the user can block receiving messages sent from Google SMS chat.

iPhone 5 to be launched in India on Oct 26 2012


Apple reported that the new and most awaited smartphone the iPhone5 will be launched in India on October 26 2012. Apple generally launches its new gadgets and devices on friday and now Apple is set to launch iPhone5 on date mentioned above.

More than iPhone5's were sold on the very first week of its launch in some countries and now Apple expects it to have higher availability after launch than any of its previous iPhone releases. Currently, iPhone5 is being sold in Indian gray/black markets for more than 1 lakh rupees. Apple has not reported about iPhone5's price yet.

Apple is said to distribute iPhone5 rather than the company's carrier partners.

Are you set to buy iPhone5? Leave your comment. 

Handle Orientation Change in iOS6

Till the version less than iOS6, interface orientation change was being handled by shouldAutorotateToInterfaceOrientation method. But in iOS6, this method doesn't work because iOS6 has new callback named "shouldAutorotate". But just by adding this method and returning YES will not work. Some code tweaks is required to get it done. This post helps you to handle all orientation change.

First of all, you need to subclass your Navigation or TabController.

  • Create a new .h and .m files and name it as CustomNavigationController.h and .m respectively.Now add these methods to .m file.
  • - (BOOL)shouldAutorotate{
        return self.topViewController.shouldAutorotate;
    }
    - (NSUInteger)supportedInterfaceOrientations{
        return self.topViewController.supportedInterfaceOrientations;
    }
  • Now create a CustomNavigationControllerobject in AppDelegate class and this in method,  application:DidFinishLaunchingWithOptions: set your newly created navigation controller object as rootViewController for window object. _window.rootViewController = _navController;
  • Now in your ViewController class, if you want your view to rotate, write this.
  • - (BOOL)shouldAutorotateToInterfaceOrientation:(UIInterfaceOrientation)interfaceOrientation{
        return (interfaceOrientation != UIInterfaceOrientationPortraitUpsideDown);
    }
    -(NSUInteger)supportedInterfaceOrientations{
        return UIInterfaceOrientationMaskAllButUpsideDown;
    }
    -(BOOL)shouldAutorotate{
        return YES;
    }
  • If you do not want your ViewController's view to rotate on device orientation, do this.
  • - (BOOL)shouldAutorotateToInterfaceOrientation:(UIInterfaceOrientation)interfaceOrientation{
        return (interfaceOrientation == UIInterfaceOrientationPortrait);
    }
    -(BOOL)shouldAutorotate{
        return NO;
    }
    -(NSUInteger)supportedInterfaceOrientations{
        return UIInterfaceOrientationMaskPortrait;
    }


Samsung to launch its Galaxy SIII mini tomorrow(11/Oct/12)


Here is the good news for the people who actually wanted little less sized screen but no compromise on the features. Confused? No? Ok then. South Korean giant SAMSUNG confirmed about its new smartphone The Galaxy SIII mini. Most awaited gadget for the people who actually stopped themselves from buying the most sold smartphone Galaxy SIII just because of the screen size. Next question which comes to your mind is, If small, how small? Well, nothing to fear. Its best suited for average size of human hand. 

As iPhone got bigger, Samsung actually started to become small. Wait. What do you mean? Haha!! No offense. Samsung started to make small sized screen devices since they heard voices from people saying its very difficult for average sized human hand to hold and use the device. So, Samsung is about to launch its mini version of Galaxy SIII(the leader in smartphone market). 

Specifications:-
  1. 4-inch Super AMOLED screen.
  2. 800x480pixels
  3. 5MP Camera with dedicated flash, VGA as front Camera.
  4. 1GB RAM.
  5. 16GB storage.
  6. 1GHz processor.
  7. With new 4.1 Jelly bean and Touch Wiz UI
After all of these, one thing is still not clear. Exactly. You are right. Price. Its still not been reported by Samsung but expected to heard from Samsung tomorrow.


Max Payne soon coming to iOS and Android


One of the most popular game named Max Payne is going to hit the Apple and Android market very soon. Game lovers can download these game to their iPhone or Android mobiles very soon. Game developer says that this game will be available in Apple App Store on April 12th and 2 weeks later on Play Store(aka Android market). Well, it seems to be very exciting for game lovers. What do you say? 

Please leave a comment in comment box below and share this article. 

Step by Step procedure to Deploy iPhone Apps to Real Devices (Tutorial)


The first step towards testing your applications on a real device is to sign up for the iPhone Developer Program at http://developer.apple.com/iphone/program/. There are two programs available - Standard and Enterprise. For most developers wanting to release applications on the App Store, they can simply sign up for the Standard program, which costs US$99. 
Check out http://developer.apple.com/iphone/program/apply.html to know more about the differences between the Standard and Enterprise programs.


Deploying iPhone Apps to Real devices :-

In order to test your iPhone applications on your device, you need to obtain an iPhone Development Certificate from the iPhone Developer Program Portal. This needs to be done once for every device you wish to test your apps on.


1.                Obtaining the identifier of your iPhone/iPod touch:-
First, obtain the 40-character identifier that uniquely identitfies your iPhone/iPod Touch. To do so, connect your device to your Mac and start Xcode. Select the Window > Organizer menu item to launch the Organizer application.


2.                Generating a Certificate Signing Request :-
Before you can request a development certificate from Apple, you need to generate a Certificate Signing Request. This step must be performed once for every device you wish to test on. To generate the 
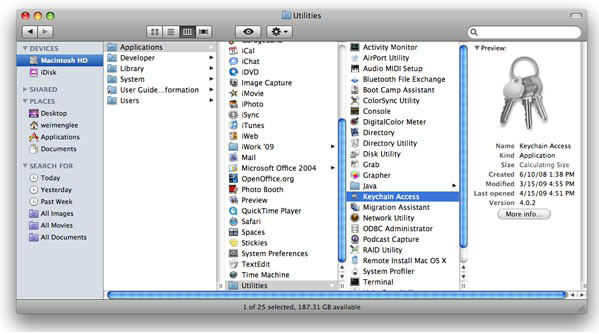
request, you can use the Keychain Access application located in the Applications/Utilities/ folder


In the Keychain Access application, select the Keychain Access > Certificate Assistant menu and select Request a Certificate From a Certificate Authority


In the Certificate Assistant window , enter your email address, check the Saved to disk radio button and check the Let me specify key pair information checkbox. Click Continue.

Choose a key size of 2048 bits and use the RSA algorithm. Click Continue.

   You will be asked to save the request to a file. Use the default name suggested and click Save


3.                Logging in to the iPhone Developer Program Portal :-
Once you have generated the certificate signing request, you need to login to Apple's iPhone Dev Center. Click on the iPhone Developer Program Portal link on the right of the page.


  In the iPhone Developer Program Portal page, click the Launch Assistant button to walk you through the process of provisioning your iPhone and generating the development certificate.


   You should see the welcome page as shown. Click Continue.


  First, you will be asked to create an App ID. An App ID is a series of characters used to   uniquely identify an application (or applications) on your iPhone. You only need to create an App ID once per application, i.e. you do not need a new App ID for new versions of your app. Enter a friendly name to describe this App ID (to be generated by Apple). Click Continue.


The next screen allows you to provide a description of your iPhone/iPod Touch. You need to provide the device ID that you have obtained earlier. Click Continue.


You are now ready to submit the certificate signing request to Apple. The instructions on the screen show you the steps that you have performed earlier. Click Continue.


  In this screen, click the Choose File button to select the certificate signing request file that you have created earlier. Once the file has been selected, click Continue.


  Provide a description for your provisioning profile. A Provisioning profile will be generated   so that you can download it at a later stage and install it on your device. Click Generate.


   A Provisioning profile will now be generated. Once it is generated, click Continue.


   You are now ready to download the generated Provisioning profile onto your Mac. Click Continue.


Drag and drop the downloaded Provisioning profile (in the Downloads folder) onto Xcode (located in the Dock). This will install the Provisioning profile onto your connected iPhone/iPod Touch. Click Continue.


You can verify that the Provisioning profile is installed correctly on your device by going to the Organizer application and viewing the Provisioning section to see if the profile has been added.


Back in the iPhone Developer Program Portal, you are now ready to download and install the development certificate onto your iPhone/iPod Touch. Click the Download Now button to download the development certificate to your Mac. Click Continue.


In the Downloads folder of your Mac, double-click on the developer_identify.cer file that you have just downloaded to install it into a keychain on your Mac. When prompted, click OK.


   Back in the iPhone Developer Program Portal, you can now verify that the certificate has been installed properly in the Keychain Access application. Click Continue.

  In the Keychain Access application, select the login keychain and look for the certificate named "iPhone Developer:". If you can see it there, your certificate is installed correctly.


   You are now almost ready to deploy your iPhone application onto your iPhone/iPod Touch. Click Continue.


   Click Done to dismiss the dialog.


  In Xcode, under the Active SDK item (if this item is not already on the toolbar, go to View >   Customize Toolbar and add it to the toolbar), select the OS version number of the device that is currently connected to your Mac.


With your application project open in Xcode, press Command-R to run the application. You will now be prompted for permission to access the certificate saved in your keychain. Click Allow (or Always Allow) to go ahead with the signing.


   Your application will now be deployed to the device. You can see its progress in the Summary tab of the Organizer application.


   Once the application is deployed onto your device, it will be running automatically. You can capture screenshots of your device by going to the Screenshot tab of the Organizer application, and pressing the capture button.


The iPhone Developer program allows you to provision up to 100 devices for testing purposes. Once a device is provisioned, you can then use the development certificate to deploy your applications onto it.


Thanks for reading this article. Hope this has helped you. Stay tuned at Techspace.

Load SVG images in iPhone / iPad using Objective C


You might have struggled a lot to load SVG (Scalable Vector Graphics)  image(s) in your iPhone or iPad application using Objective C XCode. Objective C with Cocoa helps us to load png, jpg, tiff and other image formats file using UIImage and UIImageView but UIImageView will not allow you to load SVG files. 

What are SVG images?

Scalable Vector Graphics (SVG) is a XML-based file format for two-dimensional vector graphics. SVG images and their behaviors are defined in XML text files. This means that they can be searched, indexed, scripted and, if required, compressed. As XML files, SVG images can be created and edited with any text editor, but it is often more convenient to create them with drawing programs such as Inkscape.

Now lets know how we can load SVG images in our iPhone or iPad application using Cocoa Objective-C.  UIWebView allows us to load SVG images directly to our app. The code to load SVG image is given below.
NSString *path = [[NSBundle mainBundle] pathForResource:@"image" ofType:@"svg"];
NSURL *fileURL = [[NSURL alloc] initFileURLWithPath:path];
NSURLRequest *req = [NSURLRequest requestWithURL:fileURL];
[webView setScalesPageToFit:YES];
[webView loadRequest:req];
Found interesting? Stay tuned at TechSpace for much more interesting solutions. Please leave a comment in comment  box if you have any queries.