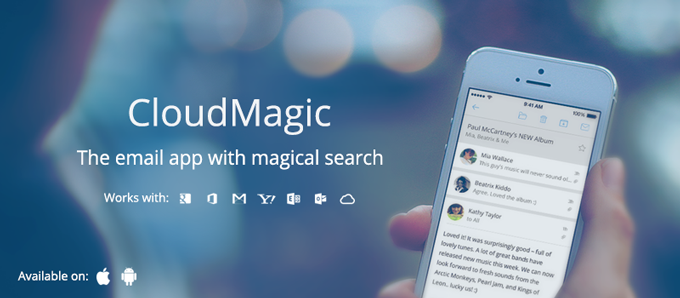
CloudMagic, Best Mail client for iOS and Android


iOS and Android has lot of mail apps in which some provide Good UI but lack in performance, some are good w.r.t it's feature but lack UI and some doesn't even suit to be called as Mail Clients. I am sure that you believe in what I just said. 

A friend of mine mentioned about CloudMagic Mail app some time during the end of October 2013 and I said, "Dude, all Mail clients are one and the same. It's better if I just stick with Gmail app"(Since I use only Gmails) After sometime, I thought let me give a try and headed to Play Store and searched for "CloudMagic". In the search results, first app which play store displayed was "CloudMagic - Free Mail App". Went ahead and installed it. After installation, it asked for login/Sign-Up. Since I already had an account which was previously associated with CloudMagic Search app, I just entered my credentials and logged in.

Wow!!! This was the first word which I said just by looking at the UI interface. As I started to look at all the features and facilities provided within the app, I was just saying 3 words. Wow!!!  Awesome!!!  and Beauty!!! Colours are just the way it is meant to be which makes it look clean and neat. No doubt why this app is currently in "Play Picks - Apps we love" section.

First thing which amazed me was the Search speed. I was running on 3G Aircel network when I did my first search. At first, I thought, network speed is brilliant but later realised that the speed with which the results are fetched are brilliantly fast and highly accurate. Best of all is, search across multiple accounts.

Next, Multiple Accounts. Gmail has already provided the feature of multiple accounts, but that is restricted only to Gmail, but this app provides facility to configure accounts of 8 different types. Earlier, they used to support max of 3 accounts and few days back, they increased it to 5.

All Inboxes My most loved feature. You can see all your configured mail accounts in the side drawer along with a special and most useful section "All Inboxes". It combines all mails from all of your accounts, arranges in decreasing order of time and differentiates mails of different accounts with different colours. You cannot customise the colour as of now. 

Default "From" address This comes handy if you have selected "All Inboxes". It provides facility for the end user to set "From" address in "From" field by default when composing a mail.

Passcode Lock No need of any third party apps to secure your mails from unauthorised user. You can set a passcode lock which will be prompted to user whenever app is opened.

CloudMagic has integrated all of the above and all the features which every mail app must have. Looking forward to have some more facilities/features like the following which makes user experience much more awesome.
  1. Swipe left and right to move/shift between mails.
  2. Color Customisation support to differentiate mails from multiple accounts.
  3. Report as spam.
  4. Zooming option within preview.

Download:

Have your ever tried CloudMagic Mail app? If not, then give a try. I am sure you will like it. Leave your comments below.

OS X 10.10 codenamed Syrah to feature iOS7's flatter look

Apple changed system wide look in iOS7 to support beautiful flat User Interface when compared to the gradient look as of iOS6 or lesser. Now, OS X 10.10 codenamed "Syrah" is rumoured to feature iOS7's flatter look. 

According to the reports from 9to5Mac, we can expect some changes to OSX 10.10 featuring blur and translucency effects in few places but not system wide. Apple engineers are currently working on how to make easy for end users to switch between OSX and iOS.

The codename "Syrah" is not confirmed, but Apple will reveal the name of it's next best OSX 10.10 later this year. 

What is your opinion about the codename Syrah? Leave your comments below.

Step by Step procedure to Upload iOS Binary to App Store


Initial Settings:-
  1. Go to the project and open info.plist. Check whether the bundle identifier(com.yourcompany.appname) is correct.
  2. Go to Project settings->Targets->Summary and change the version number to the desired value.(Do not provide any characters), check the deployment target and double check the bundle identifier.
  3. Check the deployment target in Project Settings->Project->Info
Creating a Distribution Provisioning Profile for Your App
  1. Create a distribution profile in the iOS Provisioning Portal with these characteristics:
  2. The app name in the name of the provisioning profile is optional.
  3. The app ID can identify a specific app or an app domain.
  4. Download the distribution provisioning profile.
  5. Install the distribution provisioning profile in your provisioning profiles library:
  6. Drag the <Profile_Name>.mobileprovision file to the Provisioning Profiles list in the Library section of the devices organizer.
Configuring Your Project for App Store Submission
  1. In your project, duplicate the Release build configuration and name the duplicate “AppStore”. This can be done by going to Project Settings->Project->Info and then click on Release. Just below that, you can see a '+' mark. Click on '+” mark and then select “Duplicate Release Configuration”.
  2. Set the Code Signing Identity of the project to the app's distribution profile.
    • Go to Project Settings->Project->Build Settings
    • Go to Code Signing section.
    • Change identities in all sections(AppStore, Debug, Release) to newly downloaded app's distribution profile.(As explained in above section)
    • Double check to be sure that you have selected proper distribution profile.
  3. In the Project Settings->Targets, delete the Validate Build Product build setting specification for the Release build configuration. 
    • Apple says it as delete, but you cannot delete it actually. Just make it as “NO” for Debug and Release. Make “Yes” for AppStore.
  4. Go to Product menu->Manage Schemes and duplicate the scheme that builds your app and name the duplicate as “<App_Name>-AppStore”.
  5. Select “<App_Name>-AppStore” and press Edit.
  6. Select “Archive” section and change the build configuration to “AppStore”.
Create and Validate the Archive
  1. Select the AppStore scheme to build the project. (Next to Run and Stop button).
  2. Select the iOS Device option from the scheme toolbar menu.
  3. Choose Product > Archive.
To validate the archive
  1. In the Archives organizer, select the archive.
  2. Click the Validate button.
  3. Enter your iTunes Connect credentials and click Next.
  4. Select the app you want to share and the appropriate signing identity, and click Next.
  5. Review validation issues found, if any, and click Finish.
Submit the Archive
  1. In the Archives organizer, select the archive.
  2. Click the Distribute button.
  3. Select “Submit to the iOS App Store” and click Next.
  4. Enter your iTunes Connect credentials and click Next.
  5. Select the app you want to share and the appropriate signing identity, and click Next.

Among the following who was not the President of India?


What is the notation for following functions?

What is the notation for following functions? 

1. int f(int a, float b)
{  
/* Some code */  
}

2. int f(a, b)  
int a; float b;  
{  
/* Some code */  
}

Apple rolls out 128GB iPad with Retina display on Feb 5th 2013.


Apple rolls out its first device of the year 2013 with 128GB iPad on 5th of February. Current models of iPad comes with different memory capacity with a max of 64GB. There is no much change in the device when compared to its predecessor. 

Price:-
  1. Wifi Only - $799
  2. Wifi + Cellular(4G) - $930
Are you an Apple's die hard fan and afford it just for increase in storage capacity, then go ahead. Please leave a comment in the comments section about the new iPad.

Tweet with more than 140 characters

Twitter restricts the user to 140 characters max while tweeting. Sometimes it becomes annoying. So if you wish to tweet with more than 140 characters, then here is a solution.

TallTweets has come up with a solution by which user can tweet with more than 140 characters long. TallTweet takes your tweet and post it by breaking down into chunks of 140 characters long or you can choose to convert your tweet message into an image and post it to twitter.

To get started, sign-in with your Twitter account, compose a tweet and hit publish. If there are hyperlinks in your tweet, they will be shortened using bit.ly. The app uses OAuth and therefore you won’t have to share your account credentials anywhere.

iOS 6.1 released by Apple


Apple just released its major update(iOS 6.1) with lot of fixes, stability and performance. Apple reported that this update supports 36 iPhone carriers and 23 iPad carriers around the world to provide access to the faster LTE network.

iOS 6.0 was launched in September 2012 which had lots of bug regarding maps, deletion of events in the calendar and etc… Later on, in the month of November, Apple pushed an update with iOS 6.0.1 by fixing many bugs and increased stability. After that, Apple provided 5 beta updates and finally rolled out iOS 6.1 today.

Fixes and Improvements:-
  1. LTE support for more carriers (complete list of supported carriers at www.apple.com/iphone/LTE/)
  2. Purchase movie tickets through Fandango with Siri (USA only)
  3. iTunes Match subscribers can now download individual songs from iCloud
  4. New button to reset the Advertising Identifier
  5. Redesign of lockscreen playback controls.
iOS 6.1 is compatible with iPhone 5, iPhone 4S, iPhone 4, iPhone 3GS, iPad (third and fourth generation), iPad mini, iPad 2 and iPod touch (fourth and fifth generation).

fidoFOTO 2.0 iOS App Review

Are you a puppy lover? Do you want to do fun things with your puppy's photo? Then, here is a nice app specially made for your puppy called fidoFOTO. fidoFOTO 1.0 was launched in the month of April 2012 by DMN Networks with very limited functionality. Application was priced at $1.99. Later on, in the month of October 2012, they released an update with lots of features and made its as free.


We have seen lot of applications similar to fidoFOTO but this app is outstanding in its own way. It has got legitimately good interface, beautiful cropping tool, Pretty fast Instagram like filters and finally High Resolution graphics which gives a good looking snap of your puppy.


App flow: You start by selecting an image either from the gallery or you can take a snap of your puppy from the camera and use it. Next comes a screen where-in you can either apply Insta-like effects or use a very handy cropping tool. The unique feature about Cropping tool is that you can crop by rotating your image. Next screen is the actual page where-in you add Graphic assets like Frames, Badges or Graphics on your puppy and decorate it. You can go to fidoSTORE and download amazing Graphics Packs like Christmas, Eyes, Halloween, Thanksgiving, Hair and etc… for just $0.99. I love Christmas and Eyes pack… A cool feature of Autofit for image and Stretch for Badge and Graphics is also provided. Autofit tool Autofits the base image to fit the Frame you have added and Stretch provides a functionality where-in you can actually increase or decrease the width or height of an image by pinching the asset in the specific direction. When you apply filters, it actually applies on the assets added as well. Finally you can Save image to gallery or Share it to social networking sites.    

Features:-
  1. $1.99 to Free.
  2. Beautiful and Clean user interface.
  3. Support for iPhone, iPod and iPad.
  4. Works with iOS6 and above.
  5. 110 free Standard Graphics comes with the application(High Resolution images).
  6. In App Purchase - You can download lots of other Graphics Packs like Election, Eyes, In Memory, Christmas, Thanksgiving and etc...
  7. Very neat Cropping functionality - Provides Cropping functionality with rotation. Unique Crop functionality.
  8. Pretty fast Instagram like effects.
  9. Autofit when Frame covers your image.
  10. Sharing, Saving of your puppy's modified image.
  11. Creation of Calendar event.
  12. Create fidoFOTO ID and share the photo in social networking sites(FB and twitter) if your puppy goes missing.
Download this App from App store. (This app is available only on iOS).
Watch Videos of fidoFOTO here.
Leave a comment about fidoFOTO.

Apple rumored to launch iPhone in many sizes and colors

Apple has reached to huge amount of users with its products and quality. As we have see from couple of years, Apple has announced different models of iPhone, iPod, iPads and MAC with lof of features such as Retina display, Processing speed and designs. Earlier, some users thought Apple do not launch hand-held devices in different sizes or colors(except 1 or 2 colors) but Apple proved them wrong by releasing iPhone and iPad in new size such as iPhone5, iPad mini. Some users thought they do not get chance to select device color as Apple has their devices only in 1 or 2 colors, so Apple came out with iPod touch in different colors recently in 2012 and now it might be the turn of iPhone as Apple might launch iPhone in different colors and sizes.


New model of iPhone which is rumored to be released by the end of 2nd quarter is reported to be called "iPhone5s". It is said to have about 8 colors and different sizes so as to reach lot many users and compete in the market. 

As reports, when Apple marketing chief Phil Schiller was asked whether Apple would launch iPhone in different sizes, many colors and also at cheaper price, he stated "Apple will never sacrifice quality in order to gain greater unit share in the market". 

Well, what do you think? iPhone will be available in different size and colors?

Paragon HFS+ for Windows - Read, Write and Execute Permission (Full Access)

I got totally pissed off when I installed Windows on MAC using dual boot method(Boot Camp Utility) since I had no chance of writing files or executing any applications from Mac partition(HFS+). Initially, I thought Mac partition has read, write and execute permissions, but when I tried to copy a file, it popped with an error stating "You do not have sufficient privileges/Permissions and blah blah blah…".  So I thought, its time to use third party application which supports RWX permission.

First software which I came across is Mac Drive. As Mac Drive has stated, it should have provided me with full access to Mac partition, but it turned out to be false as it provided only read and write but no executable permission. Then I thought, Ok let me give last try to get handy tool which can actually solve my problem and started to look for a software. That was the time I found Paragon HFS+.


Features:-

Full access to HFS+/HFSX partitions.
Full compatibility with Boot Camp drivers
Files and folder with “.” as the first symbol of file name are shown as hidden
USB 3.0 ready
Supports almost all Windows Operating System. 
Buy Paragon HFS+   Here
Download Trial         Here

Is your smartphone smart enough? Try Tasker

I've been using Tasker for a while now and I'm completely convinced that it was worth the money I paid for. Kudos to the people who created it. 

If you've not tried it yet, you should try it now. They give a free trial if you download and install the apk from their website. If you want to buy it right away, you can find it on the Google Play. And don't back out on it's crappy UI, because what this app can do is going to stun you. 

Disclaimer: This app is for advanced users. For geeks and nerds. For the curious bunch who can carry out step-throughs and feel the 'Eureka' moment. 

In short, Tasker makes your smartphone a 'smart' phone. It is a powerful automation app that can save you some routine manual labor that you do every once in a while. You can tell Tasker to do some "if this then that" tasks on your phone. While what Tasker can do for you is bound only by your imagination, here is a list of some very simple Tasker profiles. 

If you are at home, switch on wifi. 
If you are sleeping, scale down data usage. 
If battery is low, decrease the screen brightness.
If you open Maps or Navigation, turn on GPS. 
If you plug in earphones, start the music app.
If you are driving, read new SMS for you.

These are some very basic things you can do with Tasker. If you explore further, you will realize that you can even create a complete RSS feed reader for yourself. In addition to the inherent power of Tasker, you can give a power-boost to Tasker with third party plugins to add extra features to the endless list of features that Tasker already provides. Trust me, this can replace a few apps if you can spend some time setting it up. 

But let's stick to the basics for now. I will show you how to create a very simple profile on Tasker to get you familiar with the terms you find in Tasker. 

If you plug in earphones then start the music app.

Well, I know it's lame as most music players already help you do this with one of their option. But the idea here is to get you familiar with the app. As you can clearly see it as one of those if-this-then-that task. Where this = you plug in your earphones and that = start the music app.

You need to know what are
  • Profiles
  • Contexts
  • Tasks
So let get started.

Profiles

One complete "if this then that" part makes one profile. Let's start by creating the first profile for you. 
Step 1: Click on the green + button at the bottom center. Give a name to your profile. Say, "Start music app when headset plugged in." Press OK to see a window of context. 

Contexts = this

Talking in the Tasker terms, the 'this' part is called a context. Context is the trigger, a condition that decides whether to execute or not the 'that' part. There are different type of contexts. Application, Time, Day, Location, State and Event contexts. For now let us concentrate on State contexts. State contexts are triggers that allows you to specify a particular state of your phone's hardware or state of an app that's installed on your phone. Here in this task, it is headset plugged in or not is a state. A hardware state. 
Step 2: Select 'State' as context. Different states are categorized into different categories. Select 'Hardware'. Select 'Headset Plugged'. Select Type to be 'Any'. 
Now you will be shown a dialog with all the Tasks you have.


Tasks = that

In Tasker terms, the 'that' part is called a Task. One task specifies a set of actions to be carried out. In your case loading the 'Music Player' app is a task. 
Step 3: Start by selecting 'New Task'. Name the task something like 'Load Music App' and press OK. 
You will be shown another dialog where you can Edit your tasks. This is where you specify the set of actions. For our current required profile, there is only one action. Load app.
Step 4: Press on the + button on bottom left of the dialog box. 
Actions are again categorized. 
Step 5: Select Category as App. Inside the category select 'Load app' as that's what your action is. 
A list of all the apps that are present on your phone will be shown. It may take a while to collect that info. But not more than 2 to 3 seconds. 
And finally, step 6: Select the Music app that you want to start when headset is plugged in. Leave all the other input fields like they were. Press Ok. Then you will see that action in your Task Edit dialog. At the bottom left there is a small triangular button like 'play' button. You can press it and see if your action's working. Press Ok. 
And there you are. You've just created your first Tasker Profile. Now that you know the basics you can start experimenting around. The Tasker wiki has some great collection of profiles if you want to try out. Let me know in comments on what you built using Tasker. 

Stay tuned for more Tasker profiles :) 

Indian Railways launch Rail Radar to get train location in Google maps


The Railways has launched an online application which allows the public to track movement of trains. The application, known as Rail Radar, is an interactive map that helps passengers locate about 6,500 trains on real-time basis on both internet and their cell phones.

This application can be accessed through the railway website - trainenquiry.com. A passenger can enter a train name or number and the system will inform whether the train is delayed or running on time.

Free SMS service by Google via Google Chat


Google has launched its free SMS service in India and other countries using which users can send SMS to people who are in their contact list for free. Google has reported saying that it will not charge for SMS but initially users will be provided with 50 free SMSes. Google would decrease this count by one everytime you send a SMS but the good thing is that when a user responds to text message, the count increases by 5.

If SMS count becomes 0(zero), it would ideally reset within 24hours or the user can buy the credit by paying for the service.

This service went live in India and other 51 countries on October 10th. Google has also provided service where-in the user can block receiving messages sent from Google SMS chat.

iPhone 5 to be launched in India on Oct 26 2012


Apple reported that the new and most awaited smartphone the iPhone5 will be launched in India on October 26 2012. Apple generally launches its new gadgets and devices on friday and now Apple is set to launch iPhone5 on date mentioned above.

More than iPhone5's were sold on the very first week of its launch in some countries and now Apple expects it to have higher availability after launch than any of its previous iPhone releases. Currently, iPhone5 is being sold in Indian gray/black markets for more than 1 lakh rupees. Apple has not reported about iPhone5's price yet.

Apple is said to distribute iPhone5 rather than the company's carrier partners.

Are you set to buy iPhone5? Leave your comment. 

Handle Orientation Change in iOS6

Till the version less than iOS6, interface orientation change was being handled by shouldAutorotateToInterfaceOrientation method. But in iOS6, this method doesn't work because iOS6 has new callback named "shouldAutorotate". But just by adding this method and returning YES will not work. Some code tweaks is required to get it done. This post helps you to handle all orientation change.

First of all, you need to subclass your Navigation or TabController.

  • Create a new .h and .m files and name it as CustomNavigationController.h and .m respectively.Now add these methods to .m file.
  • - (BOOL)shouldAutorotate{
        return self.topViewController.shouldAutorotate;
    }
    - (NSUInteger)supportedInterfaceOrientations{
        return self.topViewController.supportedInterfaceOrientations;
    }
  • Now create a CustomNavigationControllerobject in AppDelegate class and this in method,  application:DidFinishLaunchingWithOptions: set your newly created navigation controller object as rootViewController for window object. _window.rootViewController = _navController;
  • Now in your ViewController class, if you want your view to rotate, write this.
  • - (BOOL)shouldAutorotateToInterfaceOrientation:(UIInterfaceOrientation)interfaceOrientation{
        return (interfaceOrientation != UIInterfaceOrientationPortraitUpsideDown);
    }
    -(NSUInteger)supportedInterfaceOrientations{
        return UIInterfaceOrientationMaskAllButUpsideDown;
    }
    -(BOOL)shouldAutorotate{
        return YES;
    }
  • If you do not want your ViewController's view to rotate on device orientation, do this.
  • - (BOOL)shouldAutorotateToInterfaceOrientation:(UIInterfaceOrientation)interfaceOrientation{
        return (interfaceOrientation == UIInterfaceOrientationPortrait);
    }
    -(BOOL)shouldAutorotate{
        return NO;
    }
    -(NSUInteger)supportedInterfaceOrientations{
        return UIInterfaceOrientationMaskPortrait;
    }


Samsung to launch its Galaxy SIII mini tomorrow(11/Oct/12)


Here is the good news for the people who actually wanted little less sized screen but no compromise on the features. Confused? No? Ok then. South Korean giant SAMSUNG confirmed about its new smartphone The Galaxy SIII mini. Most awaited gadget for the people who actually stopped themselves from buying the most sold smartphone Galaxy SIII just because of the screen size. Next question which comes to your mind is, If small, how small? Well, nothing to fear. Its best suited for average size of human hand. 

As iPhone got bigger, Samsung actually started to become small. Wait. What do you mean? Haha!! No offense. Samsung started to make small sized screen devices since they heard voices from people saying its very difficult for average sized human hand to hold and use the device. So, Samsung is about to launch its mini version of Galaxy SIII(the leader in smartphone market). 

Specifications:-
  1. 4-inch Super AMOLED screen.
  2. 800x480pixels
  3. 5MP Camera with dedicated flash, VGA as front Camera.
  4. 1GB RAM.
  5. 16GB storage.
  6. 1GHz processor.
  7. With new 4.1 Jelly bean and Touch Wiz UI
After all of these, one thing is still not clear. Exactly. You are right. Price. Its still not been reported by Samsung but expected to heard from Samsung tomorrow.


Max Payne soon coming to iOS and Android


One of the most popular game named Max Payne is going to hit the Apple and Android market very soon. Game lovers can download these game to their iPhone or Android mobiles very soon. Game developer says that this game will be available in Apple App Store on April 12th and 2 weeks later on Play Store(aka Android market). Well, it seems to be very exciting for game lovers. What do you say? 

Please leave a comment in comment box below and share this article. 

Step by Step procedure to Deploy iPhone Apps to Real Devices (Tutorial)


The first step towards testing your applications on a real device is to sign up for the iPhone Developer Program at http://developer.apple.com/iphone/program/. There are two programs available - Standard and Enterprise. For most developers wanting to release applications on the App Store, they can simply sign up for the Standard program, which costs US$99. 
Check out http://developer.apple.com/iphone/program/apply.html to know more about the differences between the Standard and Enterprise programs.


Deploying iPhone Apps to Real devices :-

In order to test your iPhone applications on your device, you need to obtain an iPhone Development Certificate from the iPhone Developer Program Portal. This needs to be done once for every device you wish to test your apps on.


1.                Obtaining the identifier of your iPhone/iPod touch:-
First, obtain the 40-character identifier that uniquely identitfies your iPhone/iPod Touch. To do so, connect your device to your Mac and start Xcode. Select the Window > Organizer menu item to launch the Organizer application.


2.                Generating a Certificate Signing Request :-
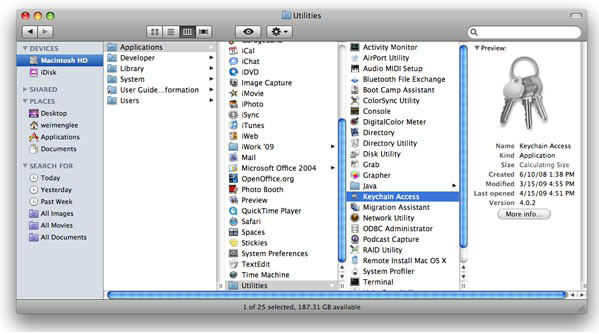
Before you can request a development certificate from Apple, you need to generate a Certificate Signing Request. This step must be performed once for every device you wish to test on. To generate the request, you can use the Keychain Access application located in the Applications/Utilities/ folder


In the Keychain Access application, select the Keychain Access > Certificate Assistant menu and select Request a Certificate From a Certificate Authority


In the Certificate Assistant window , enter your email address, check the Saved to disk radio button and check the Let me specify key pair information checkbox. Click Continue.

Choose a key size of 2048 bits and use the RSA algorithm. Click Continue.

   You will be asked to save the request to a file. Use the default name suggested and click Save


3.                Logging in to the iPhone Developer Program Portal :-
Once you have generated the certificate signing request, you need to login to Apple's iPhone Dev Center. Click on the iPhone Developer Program Portal link on the right of the page.


  In the iPhone Developer Program Portal page, click the Launch Assistant button to walk you through the process of provisioning your iPhone and generating the development certificate.


   You should see the welcome page as shown. Click Continue.


  First, you will be asked to create an App ID. An App ID is a series of characters used to   uniquely identify an application (or applications) on your iPhone. You only need to create an App ID once per application, i.e. you do not need a new App ID for new versions of your app. Enter a friendly name to describe this App ID (to be generated by Apple). Click Continue.


The next screen allows you to provide a description of your iPhone/iPod Touch. You need to provide the device ID that you have obtained earlier. Click Continue.


You are now ready to submit the certificate signing request to Apple. The instructions on the screen show you the steps that you have performed earlier. Click Continue.


  In this screen, click the Choose File button to select the certificate signing request file that you have created earlier. Once the file has been selected, click Continue.


  Provide a description for your provisioning profile. A Provisioning profile will be generated   so that you can download it at a later stage and install it on your device. Click Generate.


   A Provisioning profile will now be generated. Once it is generated, click Continue.


   You are now ready to download the generated Provisioning profile onto your Mac. Click Continue.


Drag and drop the downloaded Provisioning profile (in the Downloads folder) onto Xcode (located in the Dock). This will install the Provisioning profile onto your connected iPhone/iPod Touch. Click Continue.


You can verify that the Provisioning profile is installed correctly on your device by going to the Organizer application and viewing the Provisioning section to see if the profile has been added.


Back in the iPhone Developer Program Portal, you are now ready to download and install the development certificate onto your iPhone/iPod Touch. Click the Download Now button to download the development certificate to your Mac. Click Continue.


In the Downloads folder of your Mac, double-click on the developer_identify.cer file that you have just downloaded to install it into a keychain on your Mac. When prompted, click OK.


   Back in the iPhone Developer Program Portal, you can now verify that the certificate has been installed properly in the Keychain Access application. Click Continue.

  In the Keychain Access application, select the login keychain and look for the certificate named "iPhone Developer:". If you can see it there, your certificate is installed correctly.


   You are now almost ready to deploy your iPhone application onto your iPhone/iPod Touch. Click Continue.


   Click Done to dismiss the dialog.


  In Xcode, under the Active SDK item (if this item is not already on the toolbar, go to View >   Customize Toolbar and add it to the toolbar), select the OS version number of the device that is currently connected to your Mac.


With your application project open in Xcode, press Command-R to run the application. You will now be prompted for permission to access the certificate saved in your keychain. Click Allow (or Always Allow) to go ahead with the signing.


   Your application will now be deployed to the device. You can see its progress in the Summary tab of the Organizer application.


   Once the application is deployed onto your device, it will be running automatically. You can capture screenshots of your device by going to the Screenshot tab of the Organizer application, and pressing the capture button.


The iPhone Developer program allows you to provision up to 100 devices for testing purposes. Once a device is provisioned, you can then use the development certificate to deploy your applications onto it.


Thanks for reading this article. Hope this has helped you. Stay tuned at Techspace.